Simple Windows Screen Capture Tricks?
.png)
Have you ever found yourself in a situation where you desperately needed to capture the magic happening on your screen, but the mere thought of figuring out how to do it sent shivers down your spine? What if I told you that screen recording on Windows could be as easy as pie, and you don't need to be a tech wizard to master it? In fact, according to a recent survey, over 60% of Windows users are unaware of the tools available at their fingertips that can help them record their screens effortlessly. So, are you ready to join the ranks of proficient screen recorders and never miss out on capturing crucial information again?
Whether you're a gamer looking to share your epic wins, a professional creating tutorials for your audience, or someone who just wants to save a memorable video call, this blog post is your ultimate guide. We'll walk you through the surprisingly simple steps of using Windows Game Bar, the nifty tricks of the Windows Snipping Tool, and even delve into the sophisticated realm of advanced third-party software. But how do these methods stack up against each other? And what secret tips can make your screen recording experience even smoother? Keep reading, as we're about to unveil a world of screen recording possibilities that will change the way you capture and share your screen content forever.
Method 1: Using Windows Game Bar
Windows Game Bar is a built-in feature that allows you to record your gameplay and other screen activities. Here's how to use it:
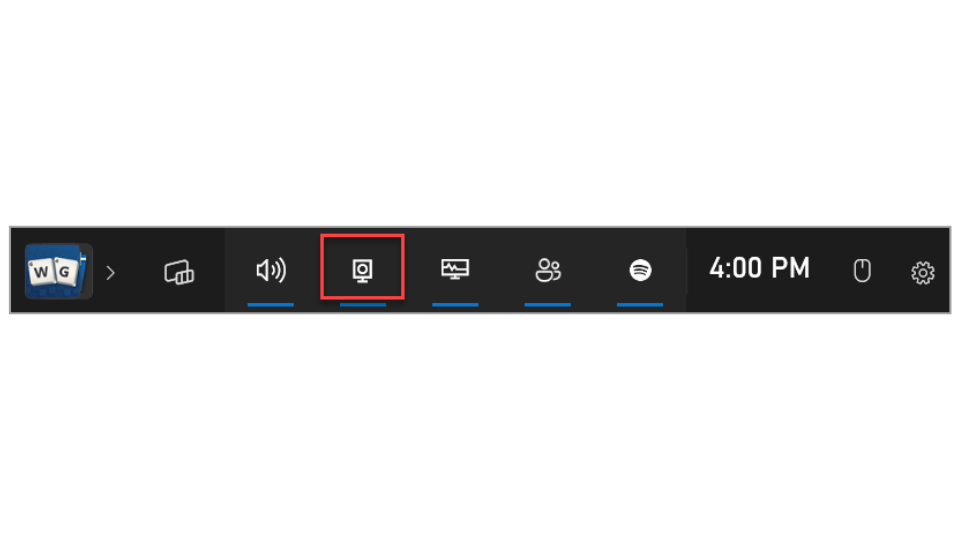
- Open the Game Bar: Press Windows Key + G to open the Game Bar. If it's your first time using it, you may need to enable it in the settings. Go to Settings > Gaming > Game Bar and toggle on "Record game clips, screenshots, and broadcast using Game Bar."
- Start Recording: Once the Game Bar is open, click on the "Start Recording" button or press Windows Key + Alt + R to begin recording.
- Stop Recording: To stop recording, press Windows Key + Alt + R again or click the "Stop Recording" button in the Game Bar.
The recorded video will be saved in the "Videos" folder under "Captures."
Troubleshooting Tips:
- If the Game Bar doesn't open, make sure you have the latest Windows updates installed.
- Some users may experience the Game Bar not responding. In this case, try to reset the Game Bar by going to Settings > Apps > Apps & features > Game Bar > Advanced options > Reset.
Method 2: Using Windows Snipping Tool
Windows Snipping Tool is another built-in feature that has been updated to include screen recording capabilities in Windows 11.
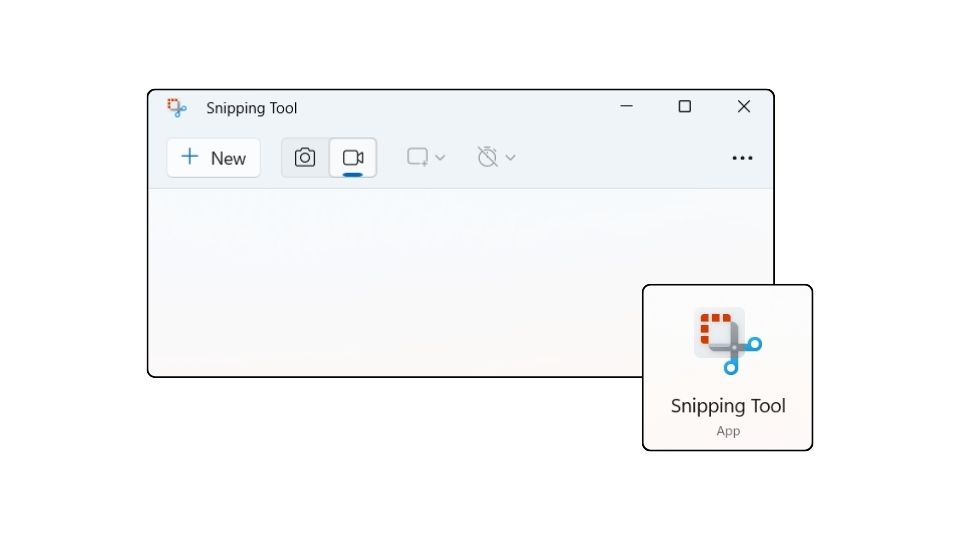
- Open Snipping Tool: Search for "Snipping Tool" in the Start menu and open it.
- Start Recording: Click on the "New" button and select "Rectangular Snip" or "Freeform Snip." Then, click on the "Record" button to begin capturing your screen.
- Stop Recording: Click the "Stop" button to end the recording.
The video will be saved in the location you specify.
Troubleshooting Tips:
- If the Snipping Tool is not recording, ensure you have the latest version of Windows 11 as this feature may not be available in earlier versions.
Method 3: Utilizing Advanced Third-Party Software
For those who need more robust functionality than what's offered by built-in tools, there is a plethora of third-party software available that can cater to more advanced screen recording needs. Among the myriad of options, OBS Studio, Camtasia, and Bandicam stand out for their rich feature sets and widespread popularity.
OBS Studio:

OBS Studio is a favorite among gamers and professional streamers due to its high customization and powerful streaming capabilities. Here's how you can use OBS Studio for screen recording:
- Download and Install OBS Studio: Visit OBS Studio's official website and download the installer for Windows. Run the installer and follow the on-screen instructions to complete the setup.
- Configure Your Scene: Launch OBS Studio and create a new scene. Within this scene, you can add sources such as "Display Capture" to record your entire screen or "Window Capture" to focus on a particular application.
- Commence Recording: In the control panel, click on "Start Recording" to begin capturing your screen.
- Conclude Your Session: Once you've captured what you need, hit the "Stop Recording" button to end the session.
By default, OBS Studio saves recordings to the Videos folder on your system, but you can modify the output path in the settings if necessary.
Troubleshooting Tips for OBS Studio:
- Run OBS Studio as an administrator if you encounter issues with screen capture.
- Update your GPU drivers if OBS Studio is not functioning as expected.
- Reduce video quality settings or ensure your system meets OBS Studio's requirements if you notice lag during recording.
Camtasia:
Camtasia is widely regarded for its intuitive interface and powerful editing tools, making it a go-to choice for creating professional tutorials and presentations.
- Install Camtasia: Download Camtasia from TechSmith's website and install it on your computer.
- Record Your Screen: Open Camtasia and select 'New Recording'. Choose the area of your screen you wish to record and any additional inputs like webcam or microphone.
- Edit and Enhance: After recording, Camtasia allows you to edit your video using a variety of tools to add effects, annotations, and transitions.
- Export Your Video: Once editing is complete, you can export your video in various formats or directly upload it to platforms like YouTube or Vimeo.
Bandicam:
Bandicam is another highly favored software, particularly for users who want to record high-quality gaming videos with minimal performance impact.
- Download and Setup Bandicam: Navigate to the Bandicam website and download the software. Install it by following the prompts.
- Select Recording Mode: Bandicam offers different recording modes such as 'Screen Recording' mode, 'Game Recording' mode, and 'Device Recording' mode.
- Record Your Screen: Choose the appropriate mode, customize settings if needed, and click the 'REC' button to start recording.
- Stop and Save: Click the 'stop' button when finished, and Bandicam will save the file in your preferred location.
Each of these third-party applications comes with its unique set of features and tools designed to accommodate various screen recording scenarios. Whether you're an educator creating instructional content, a gamer looking to share your gameplay, or a professional preparing a presentation, these tools offer the flexibility and performance needed to produce high-quality recordings.
Remember to explore the settings of each software to tailor the recording and output options to your specific needs, and consult the respective support resources for troubleshooting and optimization tips.
Comparison of Advanced Third-Party Screen Recording Software
Additional Tips and Tricks
- Record Audio: If you want to include audio in your screen recording, make sure your microphone is set up correctly in the recording software settings.
- Hotkeys: Use hotkeys to start and stop recordings more efficiently. Most recording software allows you to set custom hotkeys.
- Editing: Consider using video editing software to polish your recordings, add effects, or cut out unnecessary parts.
- Performance: Close unnecessary programs to ensure your computer runs smoothly during the recording.
Screen recording on Windows is a straightforward process once you get the hang of it. Whether you're using the built-in tools or opting for third-party software, you now have the knowledge to capture your screen effectively. Remember to experiment with different settings to find what works best for your needs and keep your software up to date to avoid any issues. Happy recording!


